Last Updated on August 5, 2023 by Dean Anderson
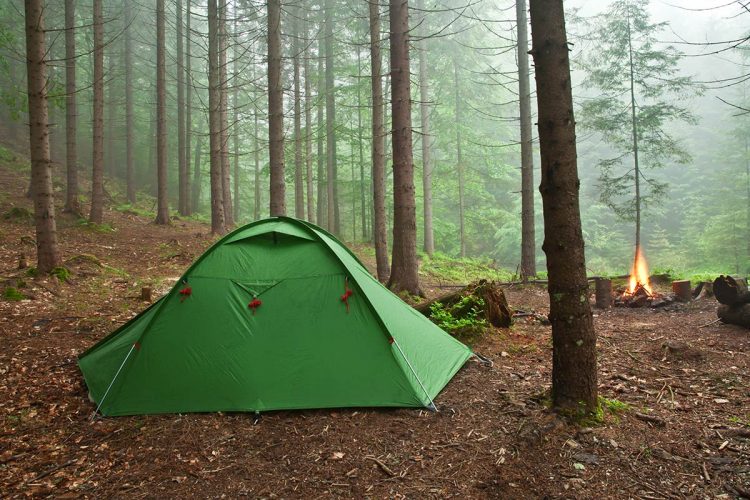
Most people are well aware of how to keep themselves warm on a winter camping trip but not so much how they can insulate their tent in order to reduce clothing bulk.
If you’ve never done it before, here are a few insulation tips to keep the cold outside and the warmth in.
How does tent insulation work?
The basic principles of tent insulation are straightforward.
It’s cold outside. You don’t want it to be cold inside. The trick is that heat likes to escape, and you’re in a tent, not a house with solid walls and insulation.
This means that you have to create a barrier to reduce the heat transfer from one material to another. Basically, you have to trap body heat.
That might sound like a tall order, but keep in mind that your tent isn’t a house. Houses are big and spacious and have multiple rooms and areas to insulate. A tent is a fraction of the size and only requires two areas of insulation: the walls and the ground.
In addition, you don’t necessarily need to heat the entire space inside your tent. You just have to keep yourself warm. Trapped body heat is more than enough to do the job. In fact, the human body emits about the same energy as a 100 watt light bulb.
Tips to insulate a tent
With that in mind, let’s talk about how to insulate a tent.
The biggest thing to keep in mind here is efficiency. You want to maximize heat conservation and minimize heat waste. That means reducing how much heat can escape and eliminating factors that would lead to runaway heat.
This starts with insulating your body!
Maintain body heat with appropriate clothing
In an effort to maintain body heat you should choose clothing for camping with care. Synthetic fibers or wool are great as they trap in warmth as well as allowing your body to breathe. Surprisingly you’ll want to avoid cotton next to your skin as it absorbs moisture.
You should also avoid tight-fitting clothing as it can restrict blood flow, leading to cold hands and feet. Wearing socks, gloves and a hat day and night can also help.
Regardless of your clothing, you should try not to overexert yourself as any sweat will lower body temperature and dampen your clothing.
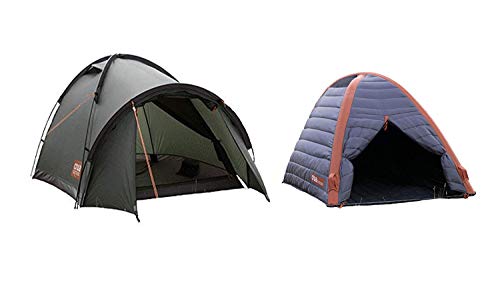
Bring a small tent for winter camping
In terms of equipment it’s actually quite simple: bring a smaller tent. In fact, bring your smallest tent. Ideally a four-season tent for winter camping specifically.
The reason is simple. Smaller is warmer. The less space you have to heat, the more the heat you have stays close to you. Ergo, warmer tent.
So, that big, breezy summer tent you use the rest of the year, it’s going to be a popsicle in the winter.
If you want more space, it is possible to get larger tents that are engineered for winter camping, but you’re going to have a harder time heating them solely because you have more space to account for.
Obviously, you can always make a tent smaller, by camping with more people. This introduces more body heat into the air.
Sleeping close together will also help to insulate heat. The less open space the better and heat radiated from another person will also warm you.
Finally, gear in your tent should be located around the perimeter adding insulation to the walls.
Location, location, location
Got your tent? Great! Now let’s talk about where to put the tent.
Location is essential in any kind of camping, but for winter tent camping, it’s absolutely critical. Remember, your primary goal is to reduce heat transfer. Where you put your tent dramatically affects your success in heating it.
Exposure is a major factor here. Those beautiful clearings you love to camp in during the summertime? They’ll leave you exposed to the wind during the winter. Make friends with the tree — they do a lot of work to protect you from wind and snow.
By the way, wind can change direction. Don’t rely on one wall of trees — look for a spot that’s protected by a natural windbreak on all sides.
In addition, watch out for any depressions or low ground when pitching your tent. Snow flows down, so if your tent is pitched in a depression, you might get flooded.
Ensure you completely clear any snow from the ground first. Firstly, lumps and bumps of flattened snow beneath you will make for an uncomfortable night’s sleep. Furthermore, the snow will melt potentially introducing moisture to your tent floor. A ground tarp can reduce the likelihood of that happening.
Also, think about where you’re going to make your fire. It’s one of the most reliable sources of heat, so if you can boost heat near your tent, you have more wiggle room for heat loss. We’re not saying pitch your tent directly on top of your fire — keep a minimum safe distance of two meters (about 6.5 feet).
Create a windbreak
Now that you’ve covered basic wind protection, it’s time to deal with incidental wind. This is where a windbreak is a lifesaver.
If you can, try to find a campsite with a rock shelter. Even a thick clump of trees can help provide a natural windbreak.
However, if it’s not possible to go au naturel (and even if you do have a rock shelter), hang a line between stakes or trees, hang a tarp tent on the line, and secure the bottom to stakes. This will shield your tent from cold wind.
Materials for insulating the walls and roof
Once you’ve gotten protection around the tent, turn your attention to the tent itself.
Generally, there are two important qualities in heat transfer:
- Density
- Reflectivity
Since the flow of heat in solids happens when atoms collide with each other (thus increasing their internal energy) materials with a higher molecular density (i.e. more molecules closer together) have more frequent collisions and thus greater thermal conductivity.
In plain English: the denser the material, the more it conducts heat and thus the faster it loses heat.
This is why the best insulation materials on the market get rid of most solid material and instead trap as much air inside as possible, usually in air pockets.
Reflectivity refers to the fraction of radiation arriving at a surface that is reflected back. If radiation is reflected back, it’s not absorbed into the material. In the case of heat, this means more heat is bounced back at you instead of escaping into the material.
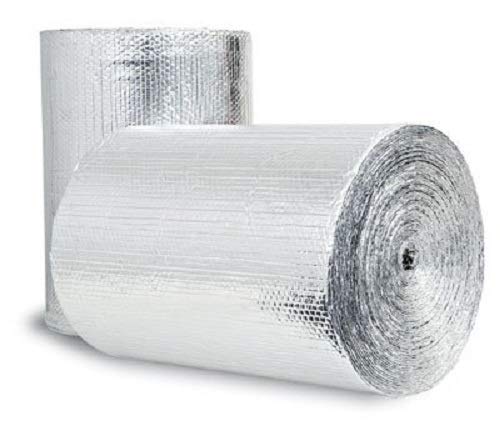
With both of these factors in mind, the best insulation material for your tent walls is heavy-duty reflective foam, which relies on pockets of human-safe trapped gases (less dense than air) and a reflective surface to minimize heat transfer. This material is flexible enough to be duct-taped to the tent walls, roof, and floor.
This will take a bit more time (and a healthy supply of duct tape) but it’s effective.
How to insulate the tent floor
We’ve talked a lot about walls. Now it’s time to look down and consider ground insulation.
Once you lie down in the tent, you definitely want to feel comfortable. The problem is that the ground is excellent at retaining cold, and the last thing you want is the winter chill seeping slowly into your bones while you sleep.
A ground mat a rug, a blanket, even some spare towels can help mitigate heat loss while you sleep.
It’s also a good idea to add a layer of reflective foam on top of your ground cover, with aluminum on both sides, as this will reflect heat back inside the tent instead of allowing it to escape into the ground.
Obviously, all this insulation means extra bulk in order to stay warm. Not a major issue if you’re car camping but backpackers will have to consider carefully the extra weight to benefit.
Choose the best sleeping solution
In terms of your sleeping options, an air mattress rather than a camping cot can work very well in this situation. An air bed traps the cold air beneath you and doesn’t allow airflow. A cot however will allow cooler air to flow beneath.
Some campers take things a step further by adding a foam sleeping pad on top of their air mattress or cot. In this instance, a cheap foam insulated sleeping pad with its low-density construction is a great option.
If you don’t want a cheap foam option go for options with a high R-Value. The ‘R’ is a value of ‘resistance’ and the ability of that product to resist the flow of heat through it.
Finally, don’t scrimp on the sleeping bag. Buy the best you can afford and look for products made of materials that trap air efficiently. Duck down products generally have a better warmth-to-weight ratio. They pack small and keep you toasty warm.
Taking a water bottle to bed with you can also help you to stay warm until you drift off to sleep.
Use a tent heater
While this post is mainly about ways to insulate you can always create warmth by introducing an additional heating source. If you feel that body heat alone just won’t cut it then consider a tent heater.
We’re not talking about any old propane heaters but a tent heater made specifically for the job. Brands like Mr. Heater have some great products.
If you don’t want the bulk of tent heaters then a lo-fi solution might be to carry heating packs. There is the use once only type or the ones that can essentially be recharged by boiling.
The Ready-Made Solution
If you don’t fancy adding insulation roll and duck tape to the inside of your tent there is an easier option. It’s also a pricier one.
Let us introduce the Crua Cocoon insulated tent. This is actually an inflatable tent inner using air and a patented material to regulate the temperature inside the tent in both hot and cold scenarios. It’s also great at dampening sound from a busy campground and for blocking out the light for a long lie-in.
The Crua Cocoon works best when used inside a larger standard tent or with Crua’s own Duo Maxx Tent. Alternatively, you could set up a tarp to protect from the rain or snow. The reviews on Amazon speak for themselves though, if you can afford it. Bear in mind it doesn’t come with the pump either!
How do you insulate your tent?
If you’ve got your own tips for insulating a tent please post them in the comment box below and we’ll weave the best ones into the post. Thanks!

Eight years ago, I took a risk and left a miserable office job to follow a lifestyle career that involved my love for the great outdoors. I’ve taken my love for camping, hiking and travel to the next level by running my small campground with a friend near Portland, Oregon. It’s for way less money but this has truly been a dream come true and the running involves lots of family and friends.
The next evolution of that was to get online and start allcampingstuff.com. At our campground, I spend a lot of time setting up camping equipment for customers and disposing of the garbage products they leave behind. If I can help just a few people with advice on good camping gear, then this website venture will be worth it.
So, if you want to avoid the duds and spend your money wisely you’ve hopefully come to the right place.